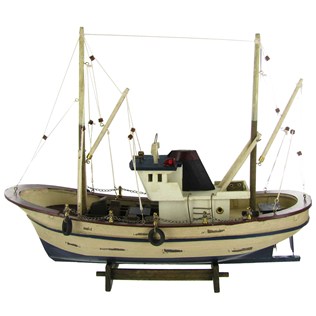
I got the following ship from Hobby Lobby (wait until it is on half-price sale, which it is on a regular basis). A large fishing trawler, very handy for Interwar to present. First, I cut it down to waterline. That wasn't easy. I don't know what wood it is made of but that and the junk they put in the make it heavy (some kind of plaster I think) made it a hard job. I mounted it on a board cut to match the hull, and patched the ragged sections with wood putty. I then removed a lot of the excess deck detail, because that detail would gotten in the way of moving the figure around (I do the same with my sailing ship and leave off the yards and sails on the bigger ones, otherwise it is too hard to move figures around with my big fat fingers). In doing so I unseated the superstructure leaving me with this.... 
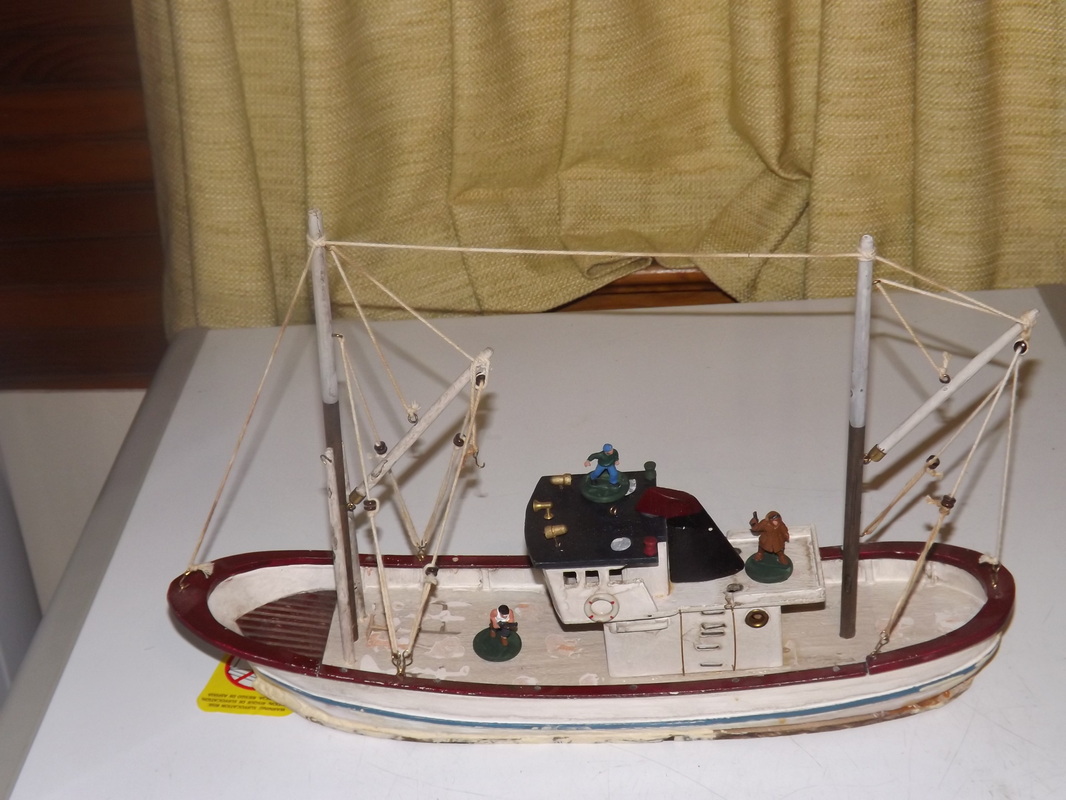
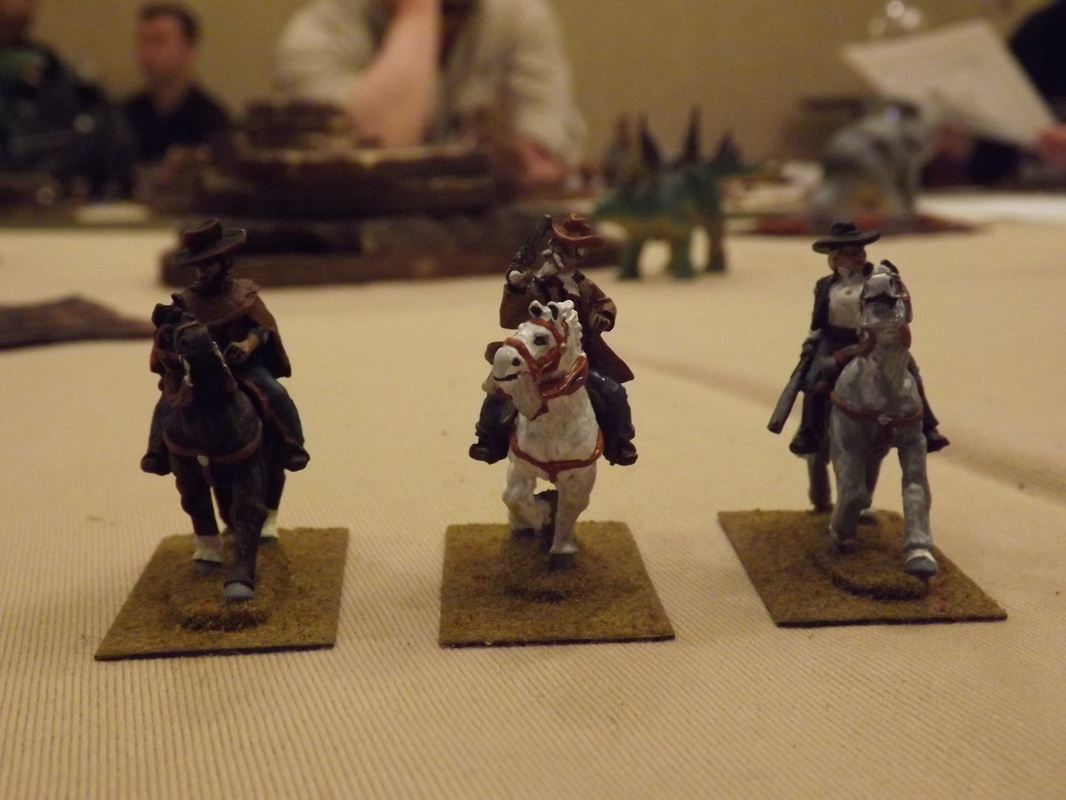
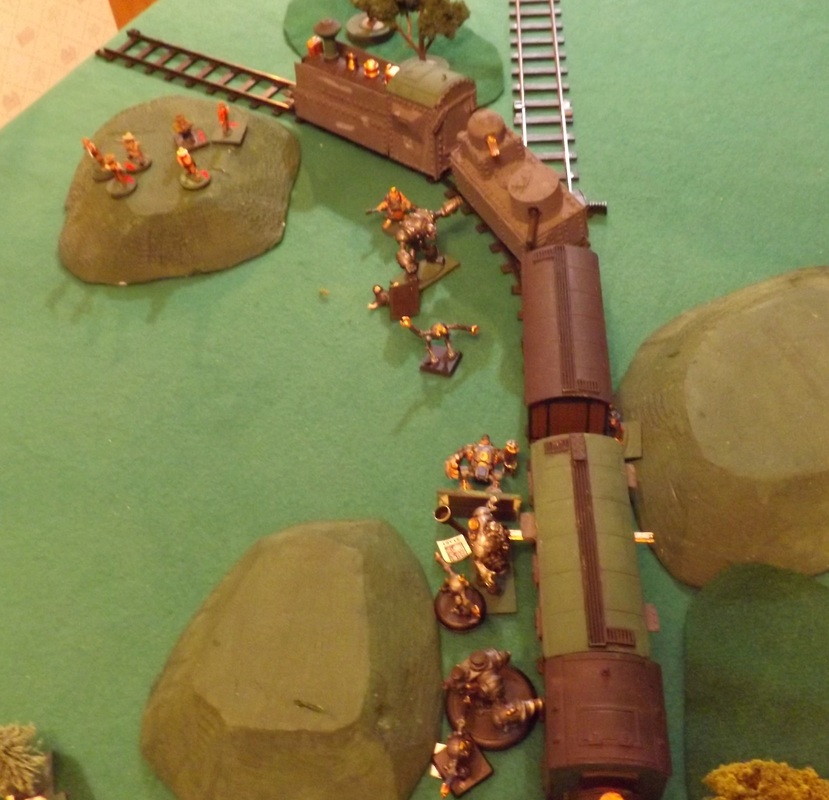
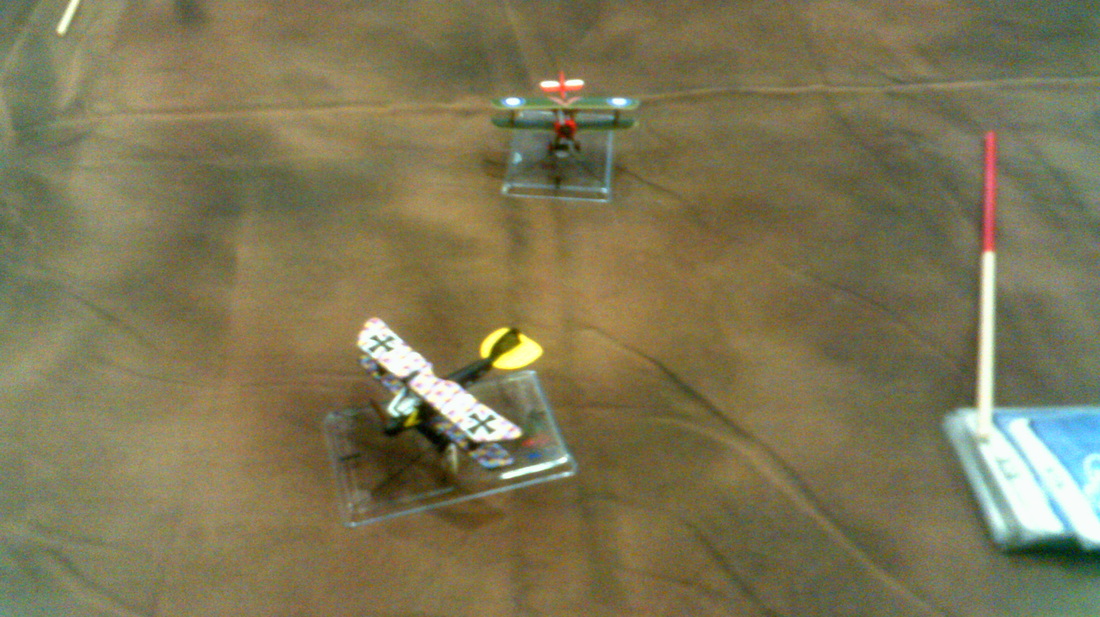
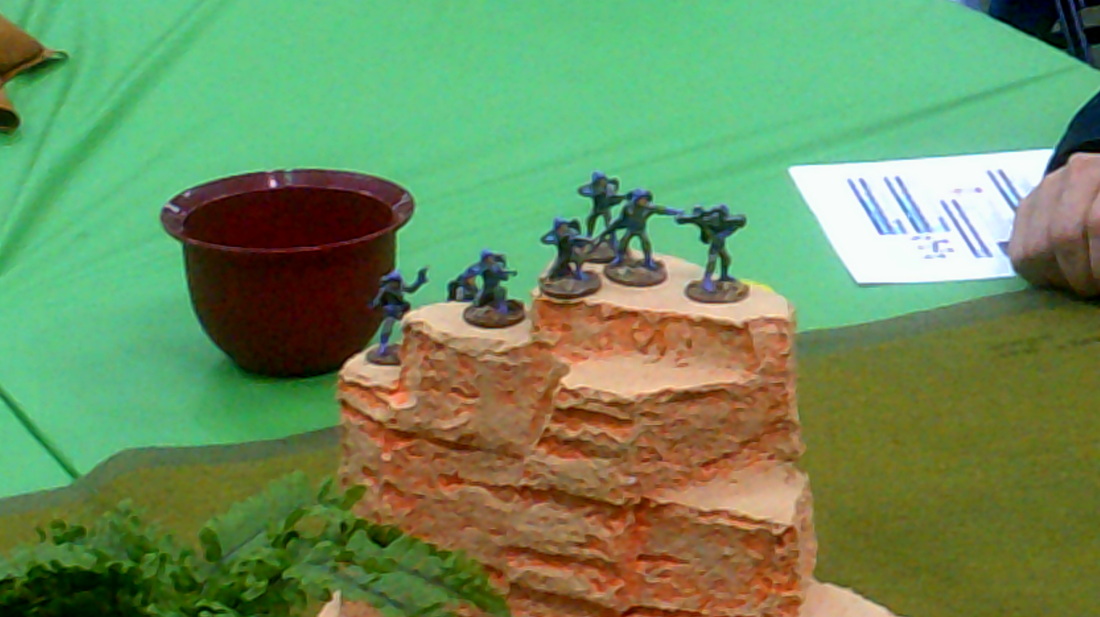
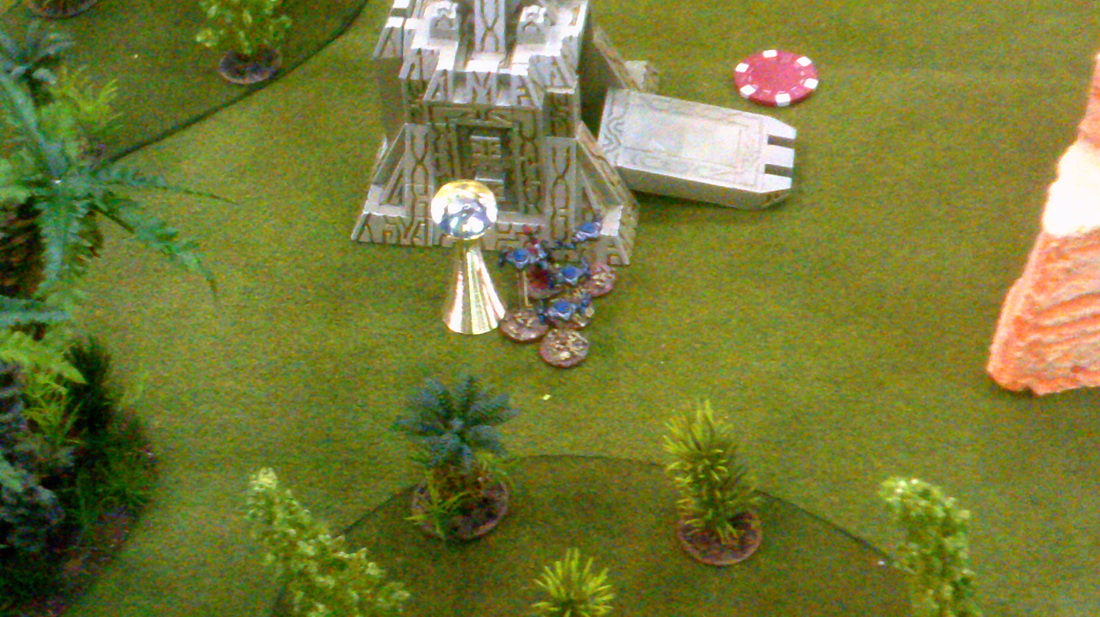
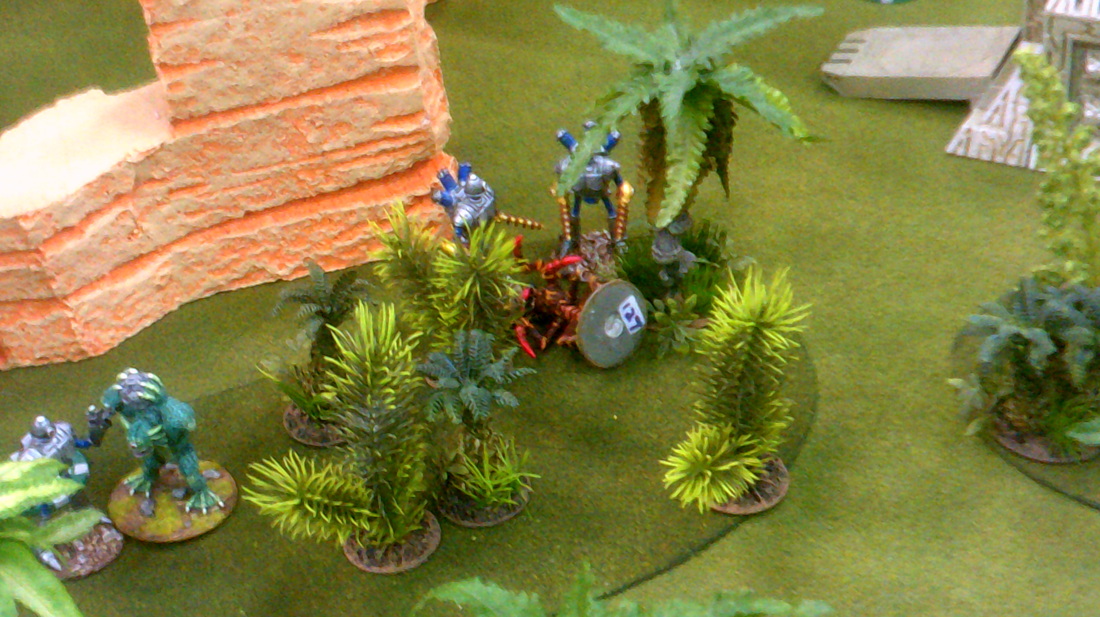
I put the superstructure back on and place a few miniatures on it. Yes, they look about right for the size of the ship. I don't know about the superstructure though. The funnel looks a bit too modern for Interwar or Pulp. 
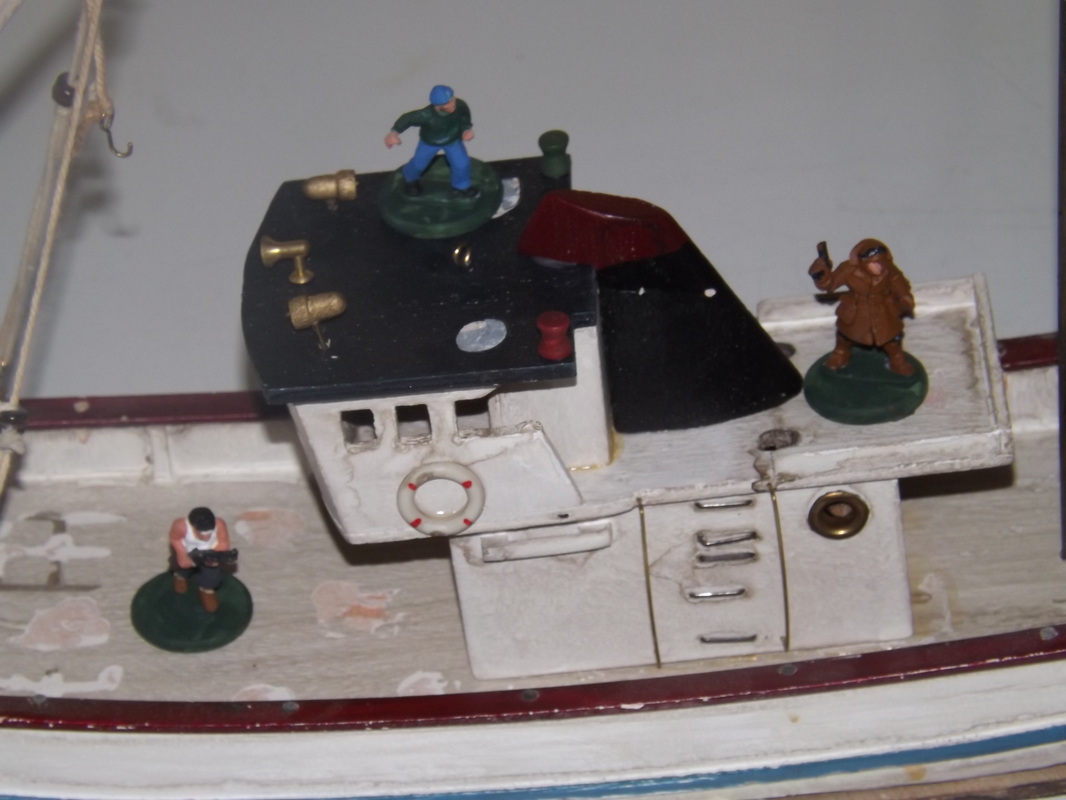
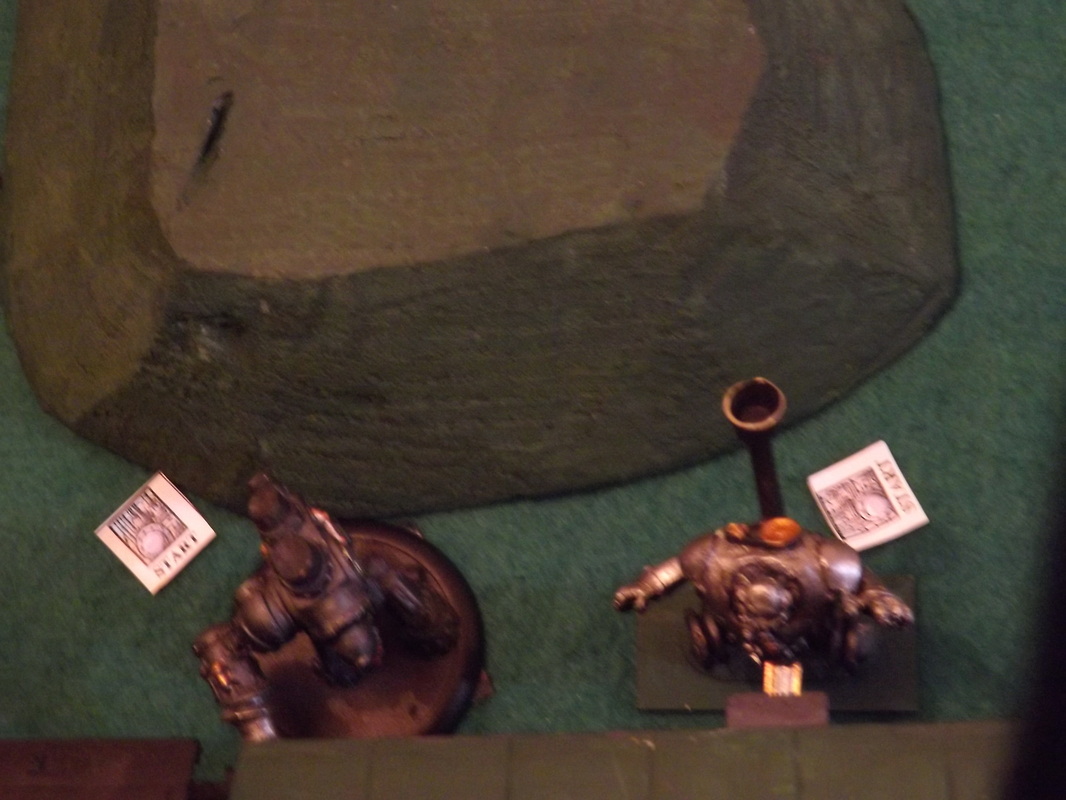
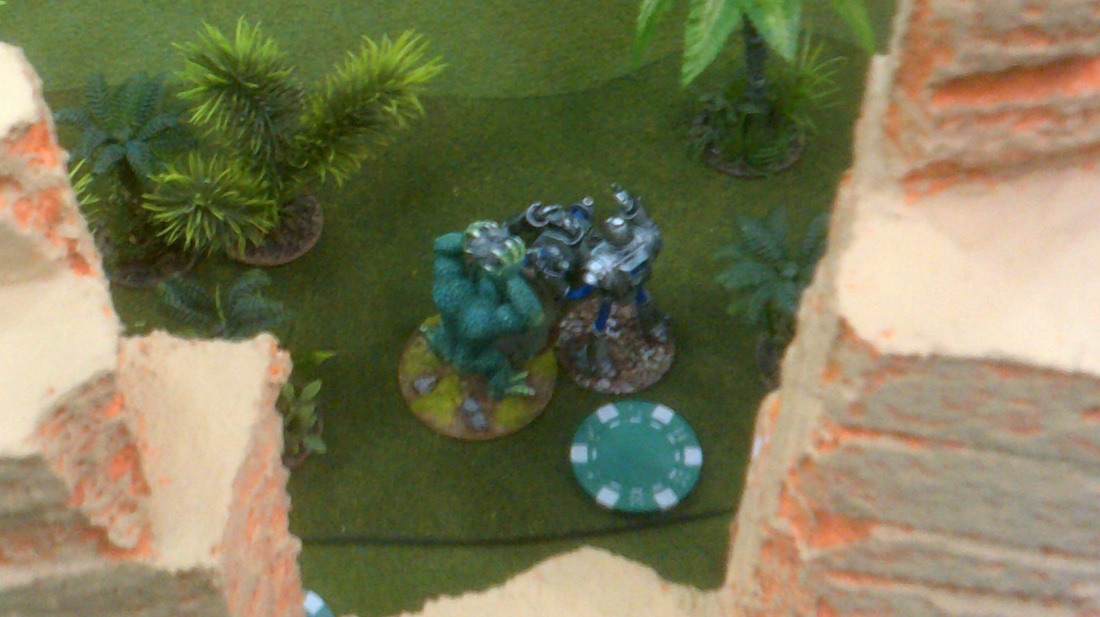
A close up of the miniatures on the trawler. 
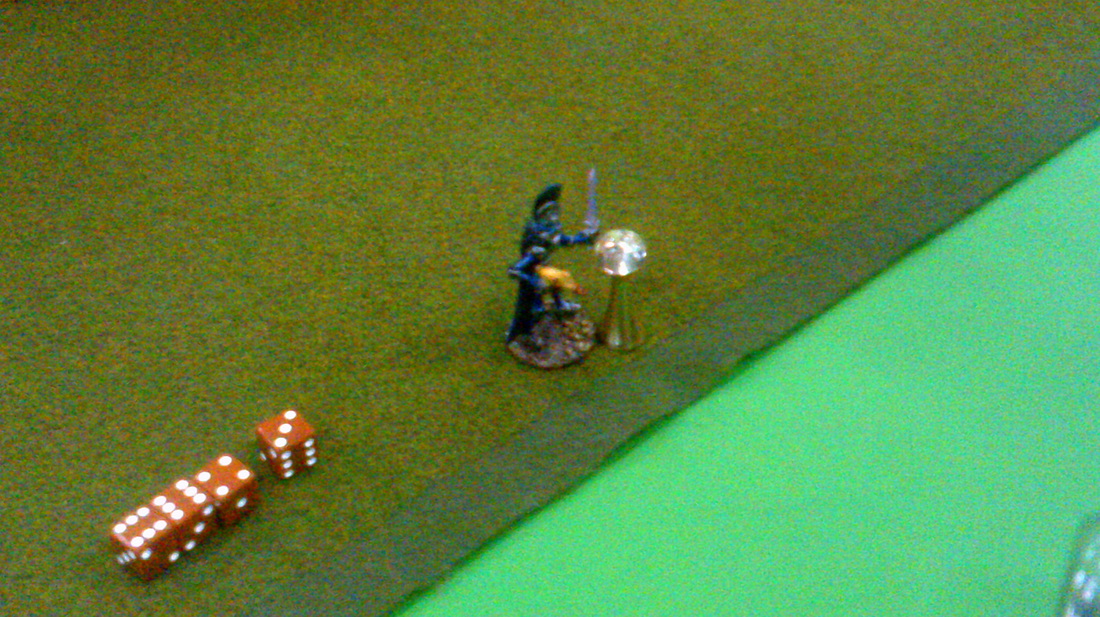
OK the superstructure is going to have to go. I can't place a miniature on each side sothe figure stands flat on the deck. You can also tell I didn't do a perfect job cutting it down to waterline. There is a slight lean to the port. 
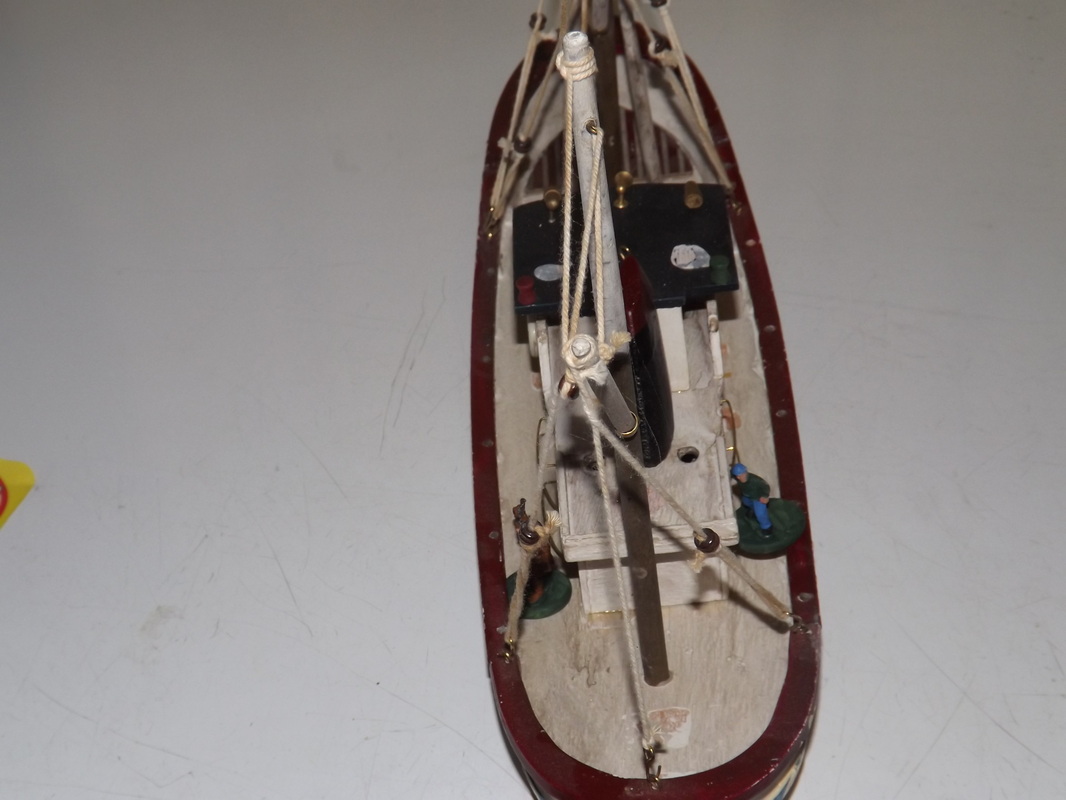
I'll need to redo the superstructure, a little smaller with a more rounded funnel. More in a much later post.
0 Comments
A rancher chasing a lost cow discovered the Valley of Garwhangi! A lost land, full of mosnters from another age. Upon hearing of this the famous Col. Phineas P. Barnstock, owner of Barnstock's Circus and Wild West Show (THE THIRD GREATEST SHOW ON EARTH) decided he needed a few of these beasties to display. After offering a large sum for live ones (and a much smaller sum for dead ones) several groups of cowboys, lawmen, and even bandits headed for the valley to try their luck at roping dinosaurs (how hard could it be, they're just big dumb lizards). Pulp Alley rules were used. My group consisted of the good Colonel himself (in the middle), Sure-shot Sue (one the right), and the mysterious El Hombre. You don't think the Colonel was going to shell out money if he could catch his own for free, do you? The one with the initiative got to hold the dinosaur skull (to make it easier to figure out initiative order) and this guy won the first initiative (seems a little too attached to that skull). The roping started off quickly, with this one being the first lassoed. In my group Sue gets the first rope on a big'un But it takes three to take it down. Three from another group ganged up on one little feller. Poor little feller, it weren't fair Others were more sporting and went after bigger prey (the bigger they were the more money they were worth). So, of course, somebody had to go after the biggest, meanest, critters they could find. Finback and the King. While Finback went down pretty quick, the King wasn't such an easy capture. as he started dragging the cowboys and their horses around. And around. One group loses their ropes, and a rider from another band snatches one up. And that group brings the big boy down. Meanwhile, my riders lasso another dino. And another. One group tries to get fancy and goes after two of the three horned critters at once. About this time, wargamers being wargamers, trouble started. First, they began shooting at each other. When that didn't do much, they began sabotaging each other, by releasing the dinos the other hogtied and then riding off. Which was kind of dangerous with the large meat eaters, as one team quickly found out. But went better with the little guys When all else failed, they started roping each other And if one rope didn't do it they would try two. And there was even the dreaded soda attack!!!! My team kept out of the fight, just kept roping and hogtieing dinos. At the very end one team tried to bring down the biggest guy, but two ropes weren't enough. By staying out of the fights and concentrating on roping dinos I won with three roped big dinos. If the extra turn card hadn't been played I'd have had even more, since one player started riding around letting my dinos go (let my dinos go - that has a nice ring to it).
I really liked the card action of Pulp Alley, though until I started throwing out cards the rest of the players really didn't understand what use the cards were. One thing I had trouble with, was the lack of effectiveness of gunfire. The roping cowboys and the releasing of dinos came about because shooting the other players didn't do much good. At the very end of the game I rode my two best shooters (El Hombre and Sure-Shot Sue) into close range and, even with their great shoot scores and having both shoot at the same person, I couldn't down him. It was the first time the guy running the game had run Pulp Alley, maybe he was telling us how to do shooting wrong? Still it was a great game. Here's Marc not looking too happy about being on the side of the Rebel Scum (a true Yankee he is). In the middle you see two units of cavalry, the USL (United State Leviathan) John Adams, the Hornet and the Wasp USALs (United States Armored Landship). To the right is a unit of Mechanical Cavalry, to the left is another unit of conventional cavalry. In front of Marc is the Grand Battery of five cannons, a Whitworth breech-loader, two 12 pdr Napoleons and two 10pdr Parrots. On his right is the CSL Memphis and the timberclad Jackson. A couple of special rules. Everyone passes their sustain the first turn. and if you start on a road you don't need a sustain check. Note, the Adams is too big for the road. The objective put the Adams on one of the hills where the Grand Battery is now for the win, or get three other Union units, more or less intact, off the far end of the board for a draw. One of the regular complaints people have made about GASLIGHT is how hard it is to kill a landship. You shoot and shoot, and rarely does anything happen. Even if you penetrate, many of the results on the table do little or no damage. Not this time. The shot from the Hornet penetrated the Memphis for a Critical Engine Hit destroying the vehicle (though 4 of the 5 crew did escape). I don't think in over a dozen GASLIGHT games that I have ran or played in have I seen such a result. Here is a general overview of the general advance of the Union forces. The Adams set back out of range of the Grand Battery and tried to shell it at long range. It missed and promptly broke down. Note the steam-cycles heading up behind the tree line. The Hornet (by the wreck of the Memphis took a hit from the Grand Battery and lost some speed. Here the Hornet crashes through the graveyard (bad luck that) and suffers a hit from the Grand Battery that kills the driver. Meanwhile the poor bloody cavalry loose a man to the heavy Gatling on the Jackson. But bravely they charged forth. And got shot to pieces, The Grand Battery had two cards as long as Captain Pelham stayed alive and here they are massacring the Mechanical Cavalry. The advancing steam-cycles were jumped by a squad from the woods, and fled ignobly. After the Whitworth damages the cannon on the Hornet (-6 to shoot), Dynamite Jack blows off some armor (-6 to Save). The Lt. in charge of the Hornet shoves the dead driver out of the way and takes over the controls. Captain Smith bravely charges part of the Grand Battery. And is promptly shot down. Charging the hill the Hornet tries to crush the guns. While a much reduced squad of cavalry (they started with eight men) take on the other section of the Grand Battery. And loose to a bunch of Artillery men armed with rammers and other artillery tools. Slowly the Adams advances (at eight inches a turn that is the only way it can advance). The Wasp (the Gatling armed landship to its right continues to be unable to restart its engine. Note the remains of the cavalry squad next to the Adams. Artillery fire and fire from the Jackson have reduced it down to three men. The cavalry played a bloody price for leading the charge, but they attracted the fire of the Grand Battery so the Adams could advance unmolested. The rocket armed Zouave fires into the Hornet, killing the last crewman, after it has crushed both 10 pdr Parrots, Cavalry Squad 2 is wiped out to man, leaving only Captain Pelham still standing amongst the carnage. Late in the battle the Wasp (the landship at the very back) finally starts. Only two are left of the Mechanical Cavalry, one regular cavalry squad has been wiped out, another is reduced to just three trooper, but the last one is still fairly strong (the one in the graveyard). Pelham stands on the hill waving his sword about, trying to get the surviving artillerymen to return to the cannons. All the while the Adams continues its indomitable advance. The Steam Cycles try to run the gap between the woods and the hill, but are attacked by Confederate Infantry. The elite Zouaves start to move towards the center of the battle, followed by the Mechanical Man (which spent most the game broke down- it would fail its sustain, the start, then fail its sustain), while the Jackson also breaks down. The other regular Confederate squad slaughters the last of the Mechanical Cavalry (who finally failed their sustain roll) but lose a man. They fail their morale check and fire at the nearest enemy. A volley of firebombs takes out the Wasp. The sacrifice of the Wasp meant that the infantry had nothing with which to attack the Adams!!! The Adams goes up the hill. There is one final chance to stop the Adams. Professor Zappinni unleashes his electro-gun upon it. It hits but fails to do damage. Victory for the Union Huzzah!!! Huzzah!!! The game ends before the Confederates can launch a final assault on the Adams, as time runs out on the clock (the game started at 9AM and was set to end at 1PM). Da Guys who played Da Game It was a real nail-biter to the end. So many ifs. If the Memphis hadn't been destroyed on the first turn, if the Mechanical Man hadn't kept breaking down, if a morale check hadn't made one squad waste its precious firebombs against the Wasp instead of saving them for the Adams. But it is a good wargame were the result is in doubt until the end.
Winter War 2014 in Champaign, IL is a fairly small con, maybe a dozen games running at a time. But I like small cons, less of a crowd, a better chance of getting in the games you want, and a lot cheaper than a big con (only $15 for the whole weekend and three dollars a game!). The only downside is fewer dealers, the only thing I bought all weekend was a paintbrush (though the mapboard I thought about buying sold before I made up my mind). This year I didn't wander around as much shooting pictures of other peoples games, but I had to take pictures of this. A multilevel hive for 40K and related games. It was not only nice to look at, but it was designed well. Miniatures didn't fall down on the ramps, big fat gamer hands (like mine) could fit in it to move pieces around, and miniatures could be easily be moved through doors and openings. It both looked good and was very playable, a rare quality. Too often I have seen terrain that looks good but is hard to move figures around (pieces fall over when placed on it or it makes figures hard to maneuver in) , or very abstract terrain that is easy to use but only so-so looking (which is what I usually use). My first game was Dino Wrangling using the Pulp Alley system. I'd bought a copy and seen a lot of AARs on other people blogs. I finally got to try the system with someone who knew how it ran (I always like to do that before I run it myself, I always miss a rule when I try after just reading the rules). More on this game in another post. Saturday morning I ran my game, "To Kill a Leviathan", which was a American Civil War by GASLIGHT game. I must have messed up when I listed it, because it ended up in the boardgames section of the con listing. Oh well, still had three players and a good game. More on this in another post. That afternoon I played in the Settlers of Catan tournament. I didn't win but with a score of 27 out of 30 I didn't embarrass myself as I had in other years. That evening I played in a Battle of Chippewa 1812 war game. I really crushed the British (caught them in a gap in the wood where the couldn't deploy well). I even wiped out on unit with just musket fire, which caused the guy running it to make a note to tweek the rules to prevent that from happening in the future (if it can be rolled it will be rolled, that is the Atlantic Wall syndrome). I took pictures of the game but I'm only going to post this one of the guy running it (too many unpainted figures on the table). Notice the War of 1812 uniform and the American Flag with the correct 15 stars and stripes. Sunday I played a Canvas Eagles/Blue Max WWI aerial combat game. I got slaughtered. I had two planes shot down and only got off three shots the whole game. Sigh....
The one funny thing that happened was the large number of mid-air collisions. When two planes entered the same hex they had to roll a D6, if the number was the same (a 1 in 36 chance) they collided and rolled 1d6 for the number of blue hit chits they took. Out of the eight possible collisions, four resulted in actual collisions (one poor guy had to take six blue chits for hits). I think as much damage was done by collisions as was inflicted with machinegun fire (again another example of the Atlantic Wall syndrome). Since I was heading to Decatur last weekend anyway, my friends there talked me into running another GASLIGHT game. This one attracted even more gamers, including a friend I hadn't seen in two years. Word gets out that the opportunity to push miniatures around a table is available and gamers come out of the woodwork. THE LEAGUE OF SCIENCE VS. THE GOVERNMENT Throughout the West banks had been robbed, gold shipments had been intercepted, bridges destroyed, and other general mayhem. The difference was that, unlike the normal run of robberies and destruction, evidence was mounting that something strange was going on. Giant mechanical men were seen carrying off safes, other times a beam of light was seen that cut the gold car off from the rest of the train, posses chasing the outlaws found themselves ambushed by people armed with unusual weapons. Agents A. Gordon and A. Oakley were sent into investigate, and found that a league of mad scientists had formed and was raising money for some nefarious scheme. Learning of a planned robbery of $5 million in gold bullion, they got word to the Army. A plan was made to ambush the ambushers. The League of Science Lead by Doctor Light this band of scientists, were supported by a few highly skilled mercenaries, plenty of mechanical men, and assorted riff-raff which consisted of "rustlers, cut throats, murderers, bounty hunters, desperados, mugs, pugs, thugs, nitwits, halfwits, dimwits, vipers, snipers, con men, Indian agents, Mexican bandits, muggers, buggerers, bushwhackers, hornswogglers, horse thieves, train robbers, bank robbers, ass-kickers, shit-kickers and Methodists!" who while skilled in killing were not so happy with standing up to people who shot back (counted as half their numbers for morale purposes). The Government Forces With information provided by Agents Gordon and Oakley, the U.S Army advanced onto the field. These forces consisted of three squads of cavalrymen, and two Small Armored Landships, all lead by that great leader Colonel Armaggedon P. (no it doesn't stand for Poopsie) Fluster. Men would follow Col. Fluster to their deaths, and probably will some day. Agents Oakley and Gordon had hidden themselves carefully to strike at just the right time, as had a surprise for the League. Another surprise for the league was hidden in the League was hidden in the boxcar at the end of the gold train. The initial setup had a group of Riff-Raff, lead by the Gunman Gunter in the woods by the logs that blocked the tracks. Another squad, Doctor Light, two other scientists (including Two-Gun Macintosh) with their Mechanical Men, and two Mechanical Servants were in the woods north of the train. The armored train was coming up the tracks, with a Mechanical Man on one side and the Dark Gunman and a group of Riff-Raff on the other side. The train had come to a complete stop while the engineer and the fireman fled (were they paid off to flee, or did they just flee in fear). A close up of the right. The Mechanical Man promptly broke down, and despite the best efforts of Professor Smith and the Mechanical Servant remained so for a couple of turns. The two Mechanical Men right north of the train began their advance. While Professor MacIntosh's Driller Mechanical Man punch a hole in the side of the armored gold car, the other went up a hill to prepare to attack another part of the car. dozens of shots from carbines and the Gatling gun bounced harmlessly off of both. In the corner farthest from the train Colonel Fluster bravely lead a troop of Cavalry and an Armored Landship onto the table. Only one squad and one Landship could enter each turn. The Armored Train, the Dark Gunman and a group of Riff-Raff advanced toward the gold train, with the Armored Train blocking the gold trains retreat (which it could have done if someone had taken over the train's controls). Meanwhile Professor Smith continues to pound on his Mechanical Man with a large wrench trying to get it to start. With the approach of the army Dr. Light lead a squad of Riff-Raff to the other side of the woods, while Professor Jones and MacIntosh kept the Mechanical Men bashing on the gold car of the train. While the second Armored Landship crested the hill, the first cavalry troop fled after Gunther gunned five of them down on two cards. Those long ranged gas-operated heavy pistols were nasty, especially since Gunther could use one in each hand. After having smashed and torn more holes in the armored train car carrying the gold (forcing a morale check on the soldiers in the car). The army's armored walker crashed out of the boxcar. Instead of dealing with the Mechanical Men it began a gun duel with the Riff-Raff on a nearby hill. While the Riff-Raff wisely stepped back out of sight of the Landships on the hill, Doctor Light tried to destroy one with her death ray. Caught a cannon round right to the face. Meanwhile, Gunther was gunned down by the Landship armed with a Gatling. It took several turns of maneuvering, but the Fluster finally had his troops in place for a charge. The two Mechanical Men who had been tearing open the train both came to a halt. One just broke down, but other one was stopped by Sgt. Granite, who stepped out on the gold car's platform and threw a firebomb at the Driller Mechanical Man. The burning liquid seeped into the working and stopped its steam engine. Taking advantage of the broke-down Mechanical Men, the Army Battlesuit attacked the nearest one. He hit, then did no damage, and promptly was knocked down by a cannon shot in the ass from the Armored Train. After gunning down a couple of the Riff-Raff on the hill near the Armored Train, Agent Oakley killed the Dark Gunman when he tried to get closer to use his Gatling pistol. After guarding the logs blocking the track for several turns, the Riff-Raff on the hill by the front of the gold train began to move towards the approaching cavalrymen. Colonel Fluster and his second in Command. Otherwise known as Grandpa Marc and Nate. Grandpa figured out the tactics, while Nate moved some of the figures and rolled the dice. I argued it was unfair for Nate to roll the dice since he hadn't used up all his luck yet at that age. Still they worked well as a team. Back at the train things were looking bad of the Agents. After gunning down Professor Smith (you only have to stay in 24 inches of the Mechanical Man to control it, not right behind it) Agent Oakley was felled by fire from the Riff-Raff on the hill. Agent Gordon, who had damaged the armor on the Armored Train slightly with a preplaced bomb and badly damaged the sights on the cannon on the train (-6 to shoot!!!), fell to the metallic pincers of a Mechanical Servant (to the right of the boxcar- I need to learn more about doing close ups with this camera). All the Mechanical Men had restarted and continued to attack the Armored Train Car with the gold in it. Except for one, which smashed the fallen Army Battlesuit, killing the soldier manning it. But it was too late, the cavalry had arrived in the nick of time (which is what they are supposed to do). One troop, led gallantly by Colonel Fluster, crashed into a bunch of Riff-Raff. They took 50% casualties but managed to deal out the same to the Riff-Raff (the Riff-Raff may have poor morale, but they are better fighters than the newly enlisted cavalrymen). Note the Armored Landship with the man on top. That is a Riff-Raff from another group that had boarded the landship and was trying to force his way inside. That other group of Riff-Raff, that had finally made it too the woods, and was promptly charged by a troop and a half of cavalry. The slaughter on both sides was great, but still both sides fought on It was over. One group of Riff-Raff broke and fled, leaving the Professors that controlled the mechanical men to the not so tender mercies of the remains of the cavalry. All the leaders of the League of Science were dead. Another gang of Riff-Raff was outnumbered and being overrun (though at great cost to the cavalry doing so). The armored trains cannon was badly damaged and couldn't be counted on to stop the oncoming landships. A victory for the good guys, but at a terribly cost.
A couple things learned. First, even if you have a good Save, you can still die if hit often enough (I may think about giving the leaders 2 hits). Second, timing is everything, Colonel Fluster took his time to establish the landships on overwatch, which killed two of the leaders and kept the Riff-Raff off the edge of the woods (you have to be on the edge of the woods to shoot out or be shot at). Then he gathered his cavalry and was able to make a grand charge, rather than feeding his men in piecemeal to be chopped up separately. That last is just common sense, but too often in gaming players just act rather than plan (which is OK for orcs or French Knights but not OK for everybody else). Every now and then, I have what I think is a great scenario, which doesn't work out so good in reality. To try to keep that from happening with the GASLIGHT game I am running at Winter War in Champaign, Illinois on January 25th. This time I got a chance to try out the scenario ahead of time with my friend Marc, his son Eric, and Eric's girlfriend over Christmas vacation. With so few players and limited table space I left out about a third of the forces on each side. Victory conditions were simple. The lines at Petersburg were broken (via the use of Leviathans and a more intelligent use of the mine, that resulted in reality in the disastrous Battle of the Crater). Union forces are pouring through the lines. The Confederates are trying to get out as many troops and supplies as they can before they are cut off by the Union. The USL (United States Leviathan) John Adams, with accompanying forces must get to a place where it can fire upon the railroad bridge used by the retreating Confederates. A scratch force of Confederate forces have been gathered together from the retreating troops to prevent this from happening. If the Leviathan reached the top of the hill at the Confederate side of the table the Union won, if not the Union lost. The layout of the table with swamp to the right and woods on the left. While vehicles couldn't go through the swamp men could at normal speed, and cavalry at 1/2 speed (no charging!!!). The House rule is that a wheeled or tracked vehicle must make an extra sustain role when in woods or other light cover, or it gets hung up an must make a start roll to break free. The Leviathan was so big it had less of a chance of that happening (it just crushes its way through trees and brush). every thing moves half speed through woods. This is the initial setup for the Union. The damn big vehicle is the ASL John Adams. To its left was a light armored landship armed with a Gatling. Beyond that was the Mechanical Cavalry armed with gas-recoil (semi-auto) carbines. Beyond that was two squads of conventional cavalry. The cavalry and the Mechanical Cavalry had already lost men in reaching this point so started worse on any morale checks. I allowed the Confederate infantry, the Rocket Zouave (soon renamed the RPG man), the dynamite gun (hard hitting but short range), and the professors operating the mechanical man to start off hidden. Some of the poker chips represented those units, other where banks. One top of the hill was the Confederate Grand Battery. Two Napoleons, two ten-pounder Parrots, and a breech-loading Whitworth (solid shot only for the Whitworth) all under command of John Pelham (two cards per turn). To the left of that was the Mechanical Man. A real vehicle killer in hand-to-hand, but it had to remain within a certain distance of the professors operating it. An armored landship lay in wait behind a building. FIRST BLOOD TO THE UNION, and my first mistake. By sitting where it started the ASL John Adams was just out of long range of the battery on the hill, but well within range of it's breech-loading heavy smoothbore. With a solid 32 pound shot it smashed the Whitworth. I should have had it start at 48 inches from the hill so the Grand Battery had a chance to fire back. Because I didn't want to give the Leviathan two cards I let it do two things a turn. The only restriction was that it couldn't move and fire. This did allow it to reload and fire, which let it fire each turn. This made setting back and blazing away at the Grand Battery a real option. I think that by starting it within 48 inches of the Grand Battery I can discourage this. FORWARD THE UNION (sort of) While the USAL (Armored Landship) the Wasp moved quickly forward, the regular cavalry stayed put in cover. The Mechanical Cavalry suffered from breakdowns and when part of it finally began to move forward, shellfire from the Grand Battery took it out. THE GALLANT WASP Moving quickly to get the Grand Battery in gatling range, the Wasp found itself the center of attention as the Confederate Landship, the Rocket Zouave and the Grand Battery all opened up on it. While most hits did little damage, a rocket penetrated and killed the two man crew. The WASP kept going and passed harmlessly through the Grand Battery. THE FIRST ATTACK ON THE MEMPHIS The CSAL Memphis tried to sneak up to get a close range shot on the Leviathan, but found itself surrounded by Mechanical Cavalry armed with firebombs. ZURPRISE! The Zouaves hidden nearby dropped a couple of the Mechanical Cavalry, while three more died from long range fire from some regular infantry across the table (five long range shots killed three who had saves and counted as being in heavy cover, good shooting Eric). ZUPRISE 2! The remaining Mechanical Cavalry decided to charge the Zouaves. Bad idea. The Zouaves were an elite unit with higher scuffles and saves. ZUPRISE 3! So the elite cavalry failed to make a dent in the Zouaves. This next charge with regular cav will do the job, not. The only good thing was that after losing a few men in the charge they were no longer in contact with the unit. The Cav's card came up first and pistol fire turned out to be much more effective. FORWARD THE JOHN ADAMS The Leviathan finally began moving forward, which attracted fire from everything on the board. The Grand Battery, the Dynamite Gun and the CSAL Memphis all attacked. Even the Mechanical Man lumbered forward. Plenty of hits (a +1 or +2 to hit because of size) but the only penetration did a speed hit, slowing the slow moving Leviathan even more. I was going to let the Leviathan Commander make a save to repair the hits, but the opportunity never came up. Instead I think I'll add an Engineering Officer to repair what can be repaired (which will use one of the Leviathans two actions). ATTACK THE MEMPHIS One of the units of regular Cavalry had three firebombs, which they used on the Memphis. Two hit, none penetrated. MECHANICAL MAN ATTACK
Finally the Mechanical Man got close enough to the Adams and still within range of its controllers to attack. One hit slowed the Leviathan to a halt. Meanwhile, the untouched regular cavalry swept past the Grand Battery. They were battered but would have been in a good position to harass the fleeing Confederates. With that result the game was called a draw. As usual in GASLIGHT the game hinged on lucky hits, two speed hits halted the Leviathan before it could even get close to the objective. Changes. 1. The Leviathan In the upcoming con it will start within 48 inches of the hill it needs to take. Marc never noticed that the Master Gunner in the crew had a higher shoot than the commanding officer. I must point this out. Need to add an Engineering Officer to make repairs. Allow it three actions (but not a move and fire) per turn, one for each officer. Boost the speed to 8 or 9 from 7 inches. Remove the Locked Hatch special ability so that it could be boarded (not that ever was tried in the test game). Hits against vehicles from the main gun are rolled on the Catastrophic Hit chart. 2. Union Cavalry Everybody gets firebombs. A one shot +0 thrown weapon has to get lucky do any real damage to a vehicle. If at least 15 Mechanical Cavalry, Steam Cycles (not used in this game) or regular Cavalry make it off the board on the Confederate end of the game table, the game is considered a tie if the Leviathan doesn't make to to the top of the Hills. 3. Grand Battery Oops, the 2nd in command's Shoot wasn't any better than the regular soldiers (each officer could personally control I.E. use his shoot number one type of cannon. When firing solid shot against a cannon it's Save is 10. For the past two years I have run a GASLIGHT game at Winter War in Champaign, Illinois. In 2012 I ran http://mysteriousbill.weebly.com/2/post/2012/01/winter-war-part-21.html In 2013 I ran http://mysteriousbill.weebly.com/2/post/2013/01/gaslight-at-winter-war-40.html In 2014 I shall run TO KILL A LEVIATHAN (more about that in a later post). But in 2015 I want to run something different, an air/sea battle with airships, ornithopters, backpack steam-powered wings, steam helicopters, steam launches, and a good size steamship to serve as the main target. I've been collecting what I need for this game for a number of years and I think I'm ready to start putting things together. I've got four Crucible Dwarf Ornithopters and have modified one with bits from the bits box and a Dixon 25mm Mounted figure. The second picture is a close-up, showing the light bomb in his hand ready to throw, with another strapped to his machine But the big aircraft for the South will be a twin-hulled catamaran zeppelin. I'll use two Revell Hindenburgs with a platform between them. Possibly with some helicopter blades for extra lift (see this link for a modern design of an airship helicopter http://blog.flightstory.net/851/boeing-to-build-heavy-lift-rotorcraft/ though mine would be more VSF). Definitely well equipped with bombs and at least one Gatling.
This gives the South one large airship, and four one-man ornithopters. Since the people running Winter War want at least six players, I really should come up with some more aircraft for the Confederates. Another airship? Pterodactyls ridden by boy soldiers? I need to figure this out. Sorry I am late with this posting. I kept hoping to get pictures of the Mordheim Round Robin game I took part in, but mine are crap and the guy running the game never sent me his. Oh well. Another game at the Con was a massive Wings of War (over 40 players). To run such a large game, the people running it simplified it. See my card below for the Camel I was running. Despite the massive number of planes on the table, I started with a one-on-one against an Albatross. After a bit of dodging around, I settled in on his tail, using my rotary turn to blaze away at him for a couple turns (doing him little to no damage of course). Having had enough of that, he went left when I went right and headed away from me at top speed. Unfortunately, I had taken an engine hit so had to do a slow each turn. This kept me from catching up with him (not that Sopwith Camels are very speedy anyway). A shot of part of the hordes of gamers this game drew. Finally catching up to him, I find that too many allies spoils the fight, as he survives by overlapping a enemy plane which kept him from getting shot at. This happened again! And again!! And yet again!!! Having had quite enough of this, I flew away from that battle looking for other Jerries to shoot. Every time I came close to a fight, the last German was shot down. So the game ended with me alive, but with no kills. Overall, it was a smashing victory for the allies, as the Huns were driven from the skies.
I learned one thing from all of this. If I am ever outnumbered, I'll fly right into the furball. It is safest there (at least it is if you are up against five or six planes being flown by different players). One of the things I like to do at CONs is try out games I've never played before. 1879 1879 is a VSF game where Brits have gone through a gate and found a new world. Unfortunately for them, ancient Mesopotamians had gone through thousands of years before. In that time they develop science (rail-gun rifles) and dark magic (zombies). I really can't say the rules are OK or not. I only had two units and a hero vs. two units (one Zombie) and two heroes. Since there were only two units per side and I had initiative I pulled a fast one. He set up one on his right, I set up one near the middle. Then he set up on one his left and I put one on my right near the other unit. This let me take on each unit one at time. First came the Zombies. Tough, but melee only troops. With fire from two units only a few made it close. And they "died" when I got off a volley as they charged in. One of my units took some damage from the rail rifles on the hill and a really bad die roll on my part disrupted the other unit, when the rail rifles switched fire to my unhurt unit. Eventually I got that other unit under control. I lost the other one in the meantime (though it did damage to his only surviving unit). In the end it ended up two stands to one and I squeezed out a victory despite some bad rolls on my part (those rail rifles were more lethal than my Martini-Henry's and had a longer range). With so few units I can't tell you if the system was good or not. It really needed to have at least six units on each side, and more kinds of units (Cavalry, Heavy Weapons. Landships). I just couldn't get a good VSF vibe off of it because of how it was run. BOLT ACTION I know that Bolt Action has been out for a while, but this is the first time I played it. Me and two others where on the British side, and faced a father and son team on the German side. On the Brits left were a Matilda I, a Stuart, an A-10, PIAT team, and two squads of foot infantry. The Germans had a three mechanized infantry squads (two in half-tracks and one that could use a truck) Sd. Kfz. 222, a Panzer II a captured A-10 (Beute Panzerkampfwagen), a Panzer IV, a PanzerJager I and a Tiger!!! Needless to say, I shit a brick about the last item, because on the right all I had was a Matilda I, a Grant (or maybe a Lee, I can never tell them apart without a tank books), an A-10, PIAT team, and three squads of foot infantry with enough Bren Gun Carriers to carry one of them. Down in the Wadi, between the two Brit forces, was a MKVI British light tank with a 15mm BESA. I don't know where the Brits scrapped up the obsolete A-10s and Matilda I's but to throw trash like that against a Tiger could only be suicide (but that's not the way it turned out). The 222 pulled out of the Wadi and up on a hill, where it came under fire from the MKVI which immobilized it by blowing off a tire with it's 15MM. The MK IV moved partially out of the Wadi and picked off the Stuart. There were two objectives on the board, a knocked out German half track, and a destroyed Churchill. The Germans ran a load of infantry in a halftrack up to one objective while another German squad ran to the other objective (while using the truck for cover?!?!). It worked but they lost their truck. On the left it was a very busy turn. The Tiger moved onto the side of the Wadi and killed the A-10 (an 88 Vs. A-10 armor, not at all an even match). The Panzer II and the halftrack full of Germans made an end move around an outcropping. A British squad that moved down into the Wadi, charged the halftrack with grenades and sticky bombs. They scored 8 hits and would have killed it on anything but a 1, so of course a 1 was rolled. The PIAT team took out the Panzer II. Then the German squad lept out of the Halftrack and close assaulted the Brits, killing four. Then the Brits with only 6 men left, made 5 kills on the Germans and won the battle (destroying the German squad and the now empty halftrack). They Don't Like It Up Them!!! On the right flank (which I was running) my Infantry and Bren Gun Carriers took cover the Wadi. While my tanks engaged the Panzer IV and the Panzerjager I in a long range (and ultimately ineffective ) duel, I sent the squad farthest from the enemy tanks in a charge towards the objective. Then once more in with the bayonets (They Still Don't Like it Up Them) and cleared out the German squad. Meanwhile the Tiger made its way around knocked out and suppressed armor, all to take the last British tank (a Matilda I) under fire, because it had been firing at the last squad of German Infantry holding the other objective. Dad should have told the kid you don't get close to Infantry without other Infantry to protect you when in a tank. For the Brit infantry charged forward once again with grenades and sticky bombs. This time they got the kill and took out the Tiger At the end no one could claim either objective. A lone German officer survived a volley of fire from the squad near the Churchill and while another Brit squad scaled the cliffs in the Wadi to deny what was left of the last German infantry squad procession of the other objective. The last running German tank, the Panzer IV, found itself facing two squads of infantry, a PIAT team and three tanks (OK one was a Matilda I and the .50 it carried wasn't a threat). There the game ended with a crushing defeat of the Afrika Korp. I like Bolt Action. Its a simple, fast system that is easy to learn and play. As an old time Gamer (remember Angriff) I found the armor rules a bit simplistic. I want more than just light, medium, and heavy guns and more than just light, medium and heavy armor (I'm sure there is extra heavy in both categories for Jagdtigers and JS tanks). While I would buy a copy of the rules and build myself an army, I have no one to play against. I'll just save my money for something else.
Arrived in Indianapolis very late on Wednesday (a three hour trip that took six because of damn road construction- I hate traveling anywhere except during the winter because of road construction). Thursday started off with a couple of quick games of King of Tokyo. A basic Kaiju board/card game in which you tried to develop the baddest monster and either winner by points or killing off all your opponents. A fun little quick game (less than an hour) that I'll have to get sometime. Out of the five new to me games I played this is probably the only one I'll buy. One hint for playing the game, try to keep your monster out of Tokyo. I no that doesn't sound right, but the monster(s) in Tokyo get pounded on by all those outside. Played a free game of Settlers of Catan while waiting for my evening game (the coupon book came with a coupon for a free ticket to a Mayfair game). The evening game was Retro Raygun. The Author of the rules, dressed up as Ace McQuire, Galacteer, somehow talked his daughters into dressing up as a Space Pirate and a Valkeeri. You can never go wrong at Gencon wearing a costume. The game was the Galacteers vs. the Robot Legion in the search for the Galactic Key. Some where, beneath one of the structures, lay the vital Galactic Key, that would give the possessor great power. You just have to fight of the enemy, destroy the shielding devices, open the vaults to the underground to find it, and successfully get it off your table edge. Nothing could be easier ;) Some of the Robot Legion's initial start (Legionaires lead by a Centurion, a couple of Warbots, and a swarm of Minibots). I have got to get a better camera, my wife broke my old one and bought another that is only fit for taking pictures of people, not close ups of miniatures. Some of the Galacteer initial setup. Two squads of regular soldiers, with Dr. Zahn, Jane Hunter and Comet the Space Chimp accompanying them. One Galacteer Squad seized the high ground by flying to the top of a mountain. They quickly flew back down behind the mountain after taking enemy fire. In this game you can shot across the board (except through very heavy cover)). Even when there is jungle between you and the target you can still shoot (at a small minus). The only reason to advance is to seize an objective or engage in hand to hand (some units like the Minibots and Hoverbots have no ranged weapons). Because of this infinite range Queen Meckanica (lower center), after the first move, just sat back at her end of the board with her squad. With her ability to force attackers to discard their best attack and defense die she and her troopers slaughtered many a Galacteer (though the guy running claimed they just ran off and only the robots actually were destroyed) and didn't loose any robot in her squad until near the end of the game, when the Centurian was hit. In this game a hit on a squad "kills" that squad. The only way to avoid this is to have a "hero" with it to get hit instead. Then you can "kill" the hero, instead of the squad. The players on the other side didn't realize this at first and kept their heroes running around separately. While the heroes were useful, this made it easy to kill a squad, which usually had more firepower than a character. On the right the large and imposing Warbots and Warbot Destroyers (the ones with heavy rayguns instead of hands) advanced. Despite being very dangerous looking, bad die rolls limit their kills on the Galacteers to Dr. Zahn, who was running about on his own. On the left great masses of Galacteers advanced lead by Ace McGuire. Simon-6 split off from the unit he was with to advance on his (its?) own Using the Vault as cover (it being one of the few things that would stop direct fire) the robots advanced. A horde of Minibots leading the way, closely followed be a Centurion with a squad of Robot Legionaries, and a Warbot. The Warbot destroyed the force field generator and the Centurion opened the vault. Meanwhile the Galacteers blaze away at the Queen's squad doing no damage, while her squad's return shots destroy some Galacteer squads. Through the open door the Centurion and his squad descended to the lower level, unfortunately attracting hostile creatures and natives to the Robot Legion Such as the Giant Bug. And the Aquaclops, which managed to destroy a Wabot. Both monsters kept the Warbots on the right busy. The horde of Minibots advance but were downed by fire by the Galacteers. Hordes are a kind of unit in Retro Raygun. Even if not destroyed by fire or hand-to-hand they still lose one member each time they are shot at or fought. Their big advantage is rather than a set number of dice to roll in HTH, the number they roll is based on the number the remaining members of the horde. This makes them very dangerous in HTH. For instance this horde of Hoverbots destroys this unit. Then this one. Akk!! what a bad photo. I've got to get a better camera.. Before losing to Comet the Space Chimp. Notice the open vault door? Good old Comet managed to Discombobulate it (that's his special skill) by monkeying around with it (sorry about that pun). Jane Hunter rushed into the Vault before the door shuts behind her. There the Centurion and his squad make short work of her and soon found the Key Meanwhile, on the surface, the Warbots finally kill the Giant Bug, but the Aquaclops battled on. The Queen's squad is finally hit after a multiple shots, but is not destroyed because her Centurion bravely (can a robot be brave?) stepped into the shot. The other Centurion brought the Galaxy Key to the surface. After dodging some last desperate shots, he escaped off the board. A win for the Robot Legion.
I found the system to be good, quick, and rather bloody. Our Warbots seemed to be a waste of points (one even fell to a horde of four natives with spears) and the Minibots only served as shot magnets. The Hoverbots speed let them destroy two squads. Queen Mechanika's ability to force the other side to remove one success on defense or offense proved very handy. Ace McQuire also had that skill, but it didn't work out for him as well. The main problem the Galacteers had was not putting their Heroes in their units. You could sacrifice the unit to save the Hero or sacrifice the Hero to Save the Unit. They also didn't use their Jetpacks well. With them they could move 24 inches (though they couldn't shoot when they used them). Instead of spending time trying to open the Vault on their side of the board, they could have flown a couple of units across to the Vault the Robot Legion opened and use that to get to the Key. Though with the hot dice I was rolling with the Queen's squad, I'm not sure even that would have worked. |
Mysterious BillI've been gaming since the 1970's and even wrote some RPG adventures in the 80's for the Judges Guild. It seems that I can only get in miniatures is gaming at cons, but I do regularly play boardgames and RPGs. Archives
February 2018
Categories
All
Links |